
How to DIY Winterize / Store your Troy Bilt Lawn Mower for the winter. How to Do It Yourself
What You will need
- -Lawn Mower
- -Motor Oil
- -Lubrication Oil
- -Drain pan
- -Rags
- -Scraper - Brush
- -Socket Wrench w/ Sockets
- -Flathead Screwdriver
- -Phillips Head Screwdriver
- -Air Filter
- -Spark Plug
- -Fuel Stabilizer
- -Fresh Gas (No more than 1-2 weeks old)
Not all Lawn Mowers are the same. This is for the Troy Built TB-230. Having said that you can pretty much apply this DIY Winterize / Store for Winter project to any Lawn Mower.
Move the Lawn mower to a flat surface.
You will need sockets of varying sizes for the spark plug and Lawn Mower Blade.
The Troy Built TB-230 needs a flathead screwdriver to remove the air filter and a phillips head to remove the engine cover. Your Lawn Mower may need both or just one of these.
Oil filters, spark plugs, air filters and fuel filters will vary or may not apply to the Lawn Mower you are winterizing / storing for the winter.
The Troy Built TB-230 does not have an oil filter. So obviously we can't check or replace it.
Check your manual or parts store to find the right air filter and spark plugs.
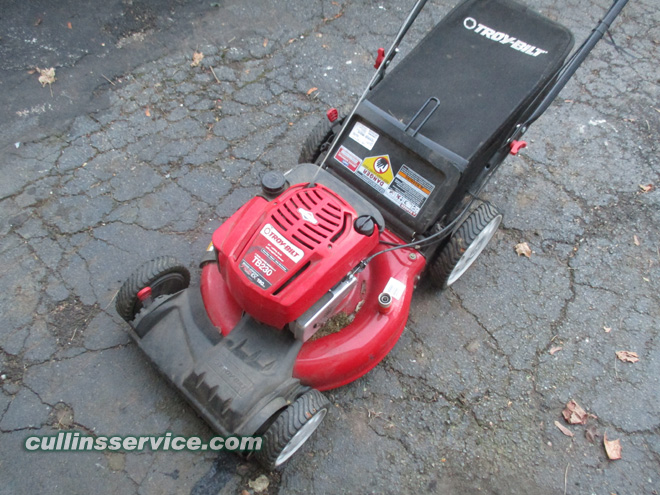
Remove Gas
Before you start winterizing / Storing your Lawn mower you are going to remove the gas / fuel from the Lawn Mower.
You can run the lawn mower until the gas runs out. You can siphon it out with a hose using your mouth or some kind of siphon pump.
I used a siphon pump.
Run Engine
It's best to run the Lawn Mower for a few minutes before you start.
It will empty out the rest of the gas and warm the oil so it flows out easier when you change the oil.
Draining the oil when it's warm will carry off many floating particles that would otherwise settle in the engine.
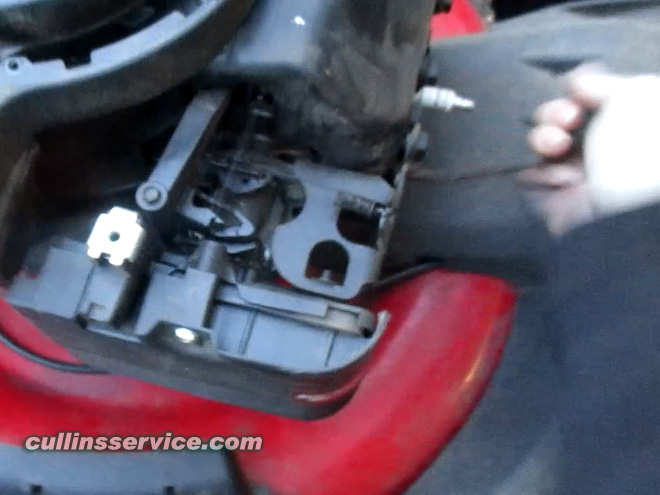
Remove Spark Plug Cap
Before doing any work make certain the blade and all moving parts have stopped.
Disconnect spark plug boot from spark plug to prevent unintended starting.
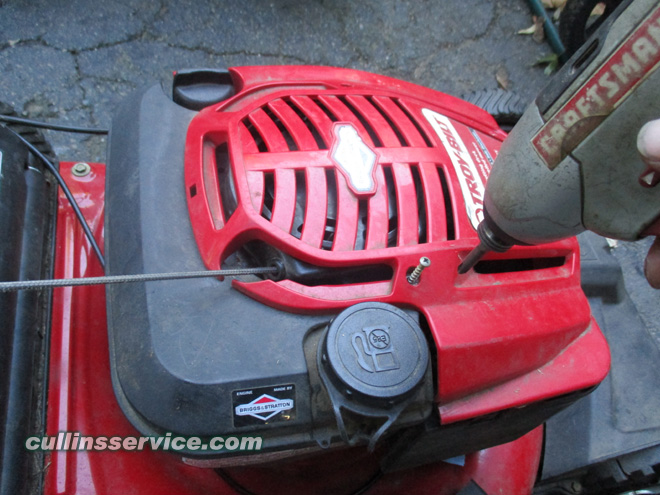
Clean Lawn Mower
You can use a brush, rag, warm water, air compressor or anything that wont scratch or destroy your lawn Mower. Clean dirt, dust, grass or any other debris that is on or has accumulated on your Lawn Mower. Keep your lawn mower clean to extend it's life.
Remove the engine cover if your lawn mower has one. This will allow you to clean behind the air filter and clean around inside. I have found grass and sticks inside along with dirt and dust. This debris can interfere with the auto choke. Clean engine regularly with a cloth or brush. Keep the top of the engine clean to permit proper air circulation. Remove all grass, dirt, and combustible debris from muffler area.
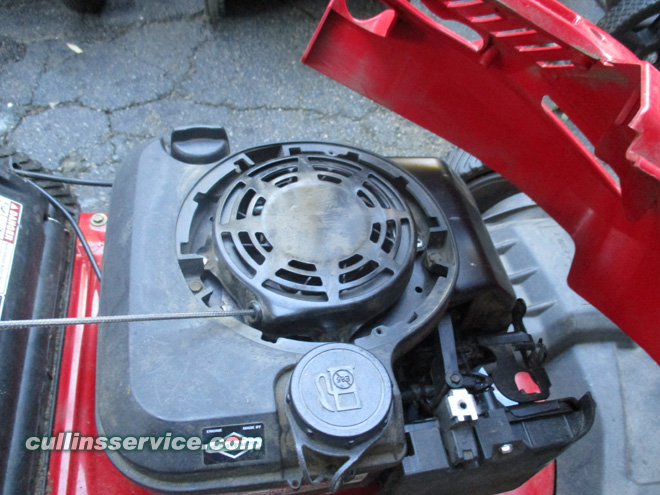
Change Oil
Check manuals for which motor oil to use and how much oil to put into the engine. Dispose of your oil in the right way. Bring it to your local dump or an auto parts store. Check the regulations in your area.
When you pour new oil into the crankcase, it's a clear golden color. Over time, the heat, dirt particles and air in the crankcase cause the oil to darken. Dark oil is not only dirty it also looses most of its ability to coat and protect engine components.
Manufacturers recommend changing the oil in your small engine after every 25 hours of operation. For a new engine, you will need to change the oil after the first five hours of operation. New engines require this to flush out small particles that accumulate naturally during the break-in period. Hours of use are just one factor in determining how often the oil should be changed. The amount of wear and tear is equally important. If your Lawn Mower is operated in dirty or dusty conditions or at high speeds, the oil in a lawn mower will break down faster under tough conditions. Wet grass, heavy dust, high temperatures and rough or hilly terrain are examples of tough conditions.
Avoid overfilling your crankcase. Too much oil can cause the same type of engine damage as not having enough. Air bubbles form in the oil, reducing overall lubrication. The resulting friction and metal-to-metal contact can cause premature part failure. Excess oil can also burn in the cylinder, producing smoke and leaving carbon deposits.
Make it a habit to check the oil level and appearance each time you're about to start your Lawn Mower. Checking the oil while the engine is cold and most of the oil is in the crankcase will show the most accurate reading. You will ensure a better-running engine and avoid problems down the road if you keep the crankcase full and change the oil on schedule and any time the oil loses its amber hue.
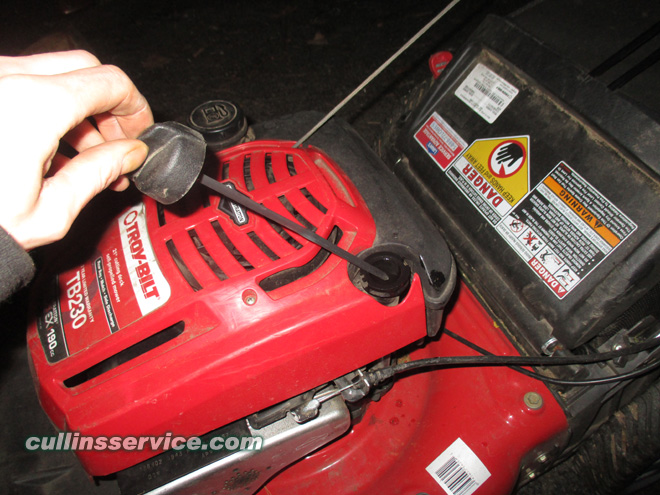
Remove Oil Cap
The oil cap is on top of the lawn mower connected to the dip stick.
Unscrew and remove.
This is were we are going to drain and fill with oil.
Some Lawn mowers will have a drain plug on the bottom of the lawn mower.
Tip Lawn Mower on Side
Position the oil drain pan and place the lawn mower on it's side.
There should be no gas in the lawn mower at this point.

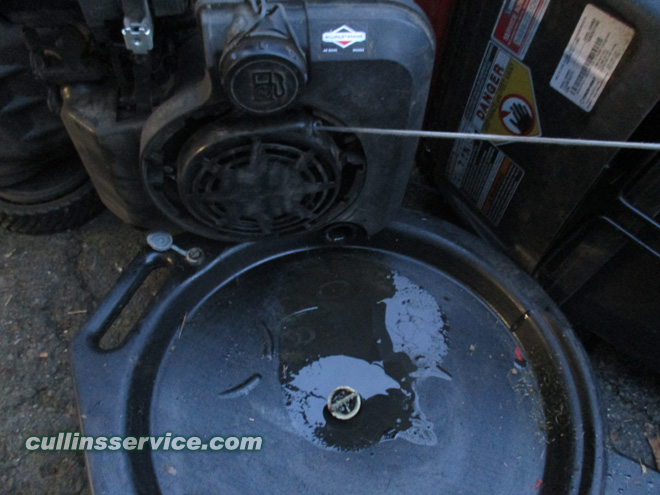
Drain Oil into Drain pan
Make sure the oil is draining into the drain pan. leave the lawn mower until the oil has finished draining.
This is also a good time to remove the lawn mower blades while you wait for the oil to drain.
Put Lawn Mower right side up
When the oil finishes draining tip the mower right side up.
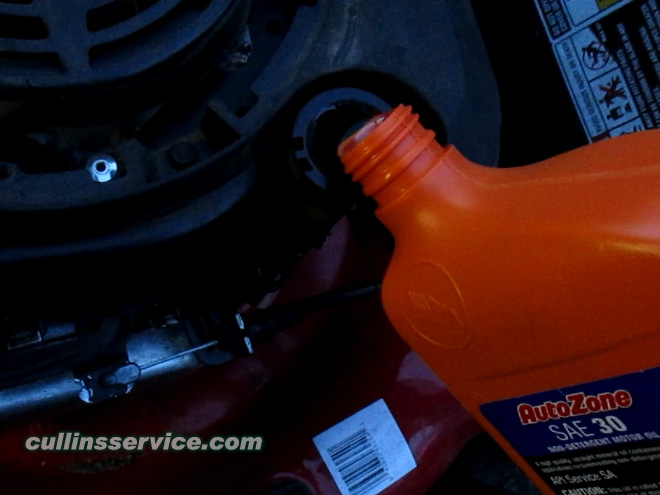
Fill Oil
see your Operator's Manual for the correct type of oil and the right amount.
Then fill er' up.
Put Oil Cap Back On
Make sure the dipstick is clean and screw the oil cap back on.
Start Mower
If you were just giving a regular oil change this would be were you start your lawn mower.
Seeing we are also winterizing / storing the lawn mower there is no gas in your lawn mower.
Wait until we run the Lawn mower with fuel stabilizer to do this step.

Check Oil Level
After you let the lawn mower run for a minute stop and pull out the dipstick. check to make sure it is at the correct mark. This should be visible on the dipstick. Fill or drain until it reaches the right level.
Remove Blade / Clean Deck
When removing the cutting blade for sharpening or replacement, protect your hands with a pair of heavy gloves.
Use a heavy rag or piece of wood to hold the blade.
Periodically inspect the blade adapter for cracks, especially if you strike a foreign object.
Replace when necessary.
Broken, dull and damaged lawn mower blades can cause a number of problems. Damaged or unbalanced lawn mower blades can cause excessive vibration in the mower.
Dull lawn mower blades usually get noticed by ripped blades of grass turning brown and irregular patterns they make in the lawn.
Lawn mower blades should be sharpened several times to extend their life and ensure that your grass gets a healthy cut, but they can only be filed so many times before a blade replacement is necessary.
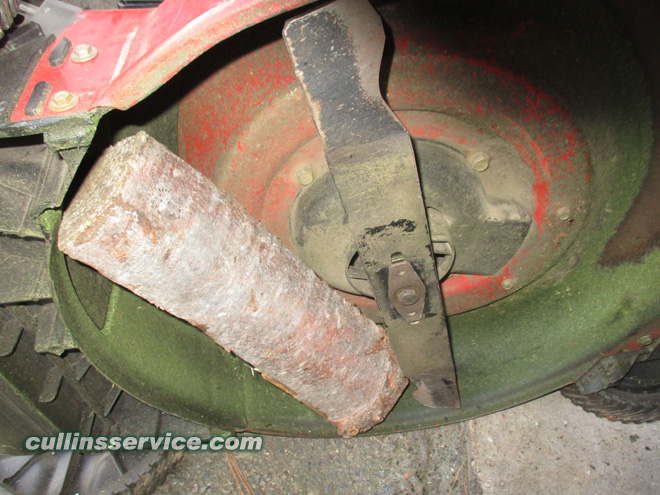
Remove Lawn Mower Blade
Tilt your lawn mower on it's side.
The gas should be removed at this time.
We are winterizing / storing the lawn mower so the oil is draining out right now
If there is oil in the engine, make sure the filter and carburetor is facing the sky.
If not the oil may leak through the carburetor or filter.
Wedge a log or block of wood against the lawn mower blade so it won't move.
Get the right size socket or wrench (check the owners manual or size it)
Remove the bolt and the blade bolt support which holds the blade and the blade adapter to the engine crankshaft.
Remove blade and adapter from the crankshaft.
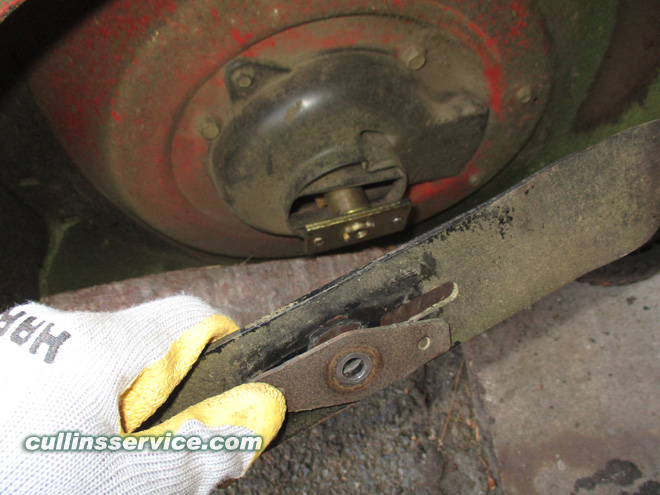
Inspect Lawn Mower Blade
Inspect the blade.
It is important to look for dull edges and large chips or dents in the cutting edge.
Dull edges and large chips or dents in the blade are likely to tear grass rather than giving a clean cut, and that's important for your lawn.
Pay attention to the thickness of your lawn mower blade. Over time, sand, dirt, and other yard debris can erode the blade, causing the metal to weaken and become thin.
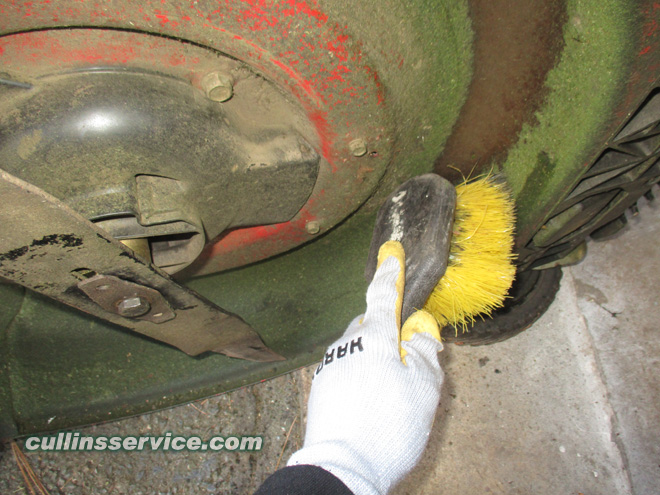
Clean Deck
While your Lawn mower is in this position, it is a good idea to get in there and scrape or brush any built up debris under the deck.
Your mower's deck may be equipped with a water port on its surface as part of its deck wash system.
Use the deck wash to rinse grass clippings from the deck's underside and prevent the buildup of corrosive chemicals.
-Push the mower to a level, clear spot on your lawn, near enough for your garden hose to reach.
-Make certain the mower's discharge chute is directed AWAY from your house, garage, parked cars, etc.
-Thread the hose coupler (packaged with your mower's Operator's Manual) onto the end of your garden hose.
-Attach the hose coupler to the water port on your deck's surface.
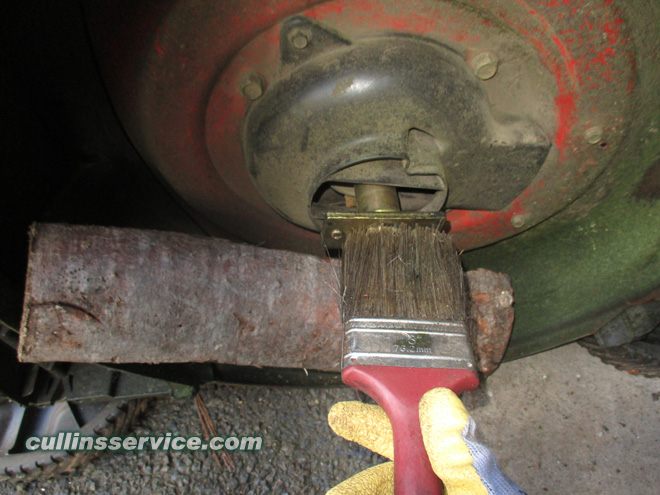
Lubricate Blade Axle
Lubricate the engine crankshaft and the inner surface of the blade adapter with light oil.
I use engine oil.
You can use any light oil you like.
Reinstall Lawn Mower Blade
Place the blade on the lubricated engine crankshaft such that the side of the blade marked "Bottom" (or with
part number) faces the ground when the mower is in the operating position.
Make sure that the blade is aligned and seated on the blade adapter flanges.
Place blade bell support on the blade.
Align notches on the blade bell support with small holes in blade.
Replace hex bolt and tighten hex bolt to torque (check the owners manual for torque specs)
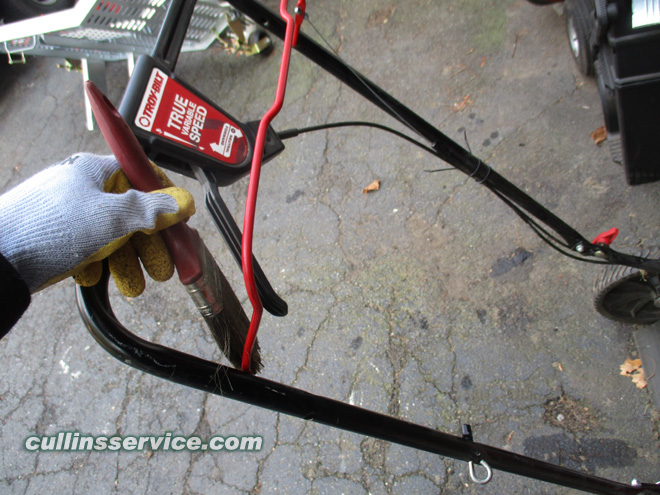
Lubricate
Lubricate pivot points on the blade control at least once a season with light oil.
This control must operate freely in both directions.
Spark plug
Clean spark plug and reset the gap once a season.
Spark plug replacement is recommended at the start of each mowing season.
Check engine manual for correct plug type and gap specifications.
You will need to get the right size socket and a socket wrench.
Unscrew the spark plug and screw it back in when you are finished.
Air Filter
Service air cleaner every 25 hours under normal conditions.
Clean every few hours under extremely dusty conditions.
Poor engine performance and flooding usually indicates that the air cleaner should be cleaned or replaced.
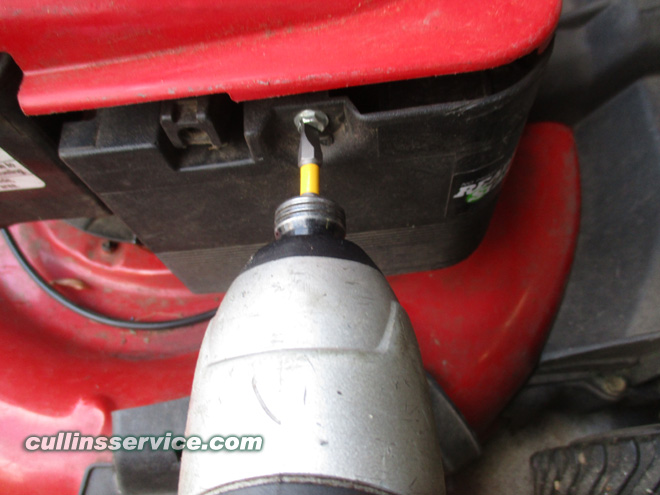
Remove Air Filter Housing
Locate the air filter housing.
The Troy Built TB-230 has one flat head screw holding the air filter housing on.
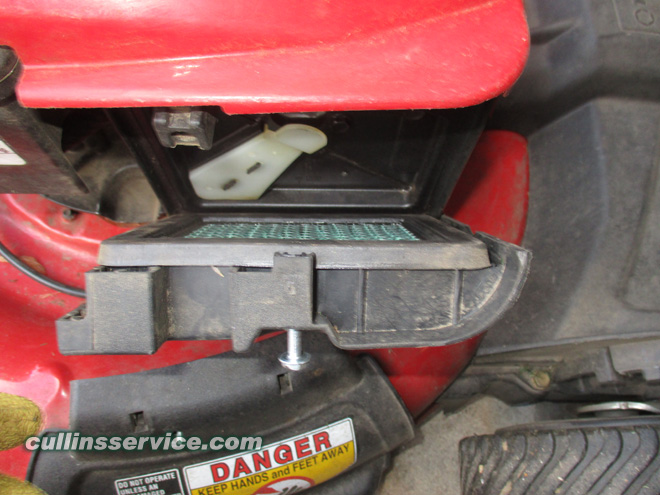
Remove Air Filter
Once the screw is loose (screw is connected to the housing) the housing just folds down.
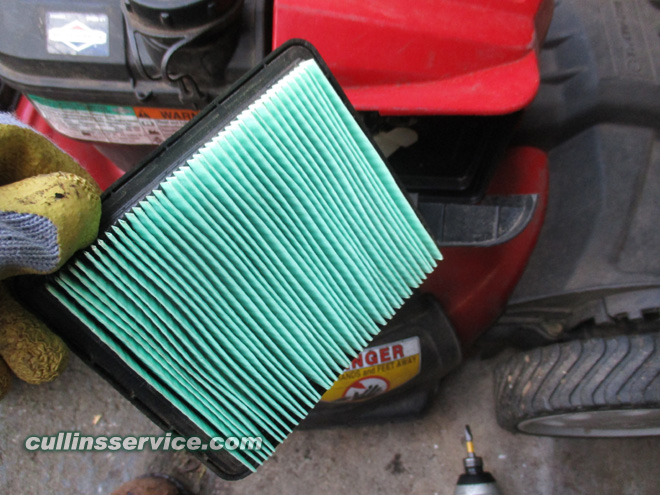
Inspect Air Filter
The housing door folds down and can come off.
Take the air filter out and inspect it.
If it's in bad shape replace it. (check the owners manual or local parts store for air filter)
If it's ok just clean it out.
Clean out the air filter housing before putting the air filter back in.
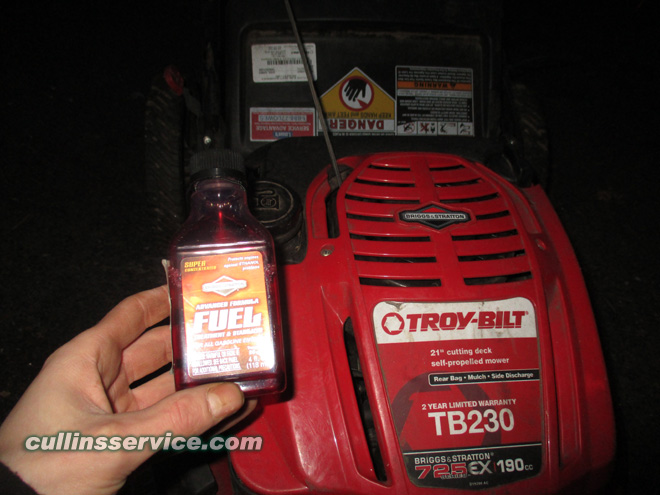
Fuel Stabilizer
I am using Briggs and Stratton Fuel Stabilizer. You can use any Fuel Stabilizer you like.
Fuel Stabilizer stop the harmful effects associated with ethanol blends, which account for nearly 90% of all fuel sold in the U.S.
Ethanol-blended gas is especially prone to deterioration, leading to rust in the fuel tank, corrosion, gum build-up, and even severe engine damage.
This is reflected in performance, yielding starting issues and rough running.
Here's why:
-Ethanol-based fuels attract moisture, which eventually separates from the fuel
-A layer of ethanol-enriched water forms at the bottom of the tank, which is highly corrosive for engine parts
-Gum and varnish forms as the fuel breaks down, resulting in stuck intake valves, clogged fuel lines and carburetor jets
-Fuel can go stale in 30 days or less
Benefits of Fuel Stabilizer for Small Engines
-Protect Engines Against Ethanol Triple Antioxidant
-Dual corrosion inhibitors guard metal engine parts against corrosion
-Metal De-Activator stops chemical reactions caused by dissolved metals in fuel
-Detergent ingredients prevent gum and varnish build-up on engine parts
-Water Protection inhibitors protect against the harmful effects of water in fuel due to ethanol
Add Stabilizer
Add fuel treatment according to instructions.
If gasoline in the small engine has not been treated with a fuel stabilizer, it must be drained into an approved container.
Run the engine until it stops from lack of fuel.
The use of a fuel stabilizer in the storage container is recommended to maintain freshness.
It is also recommended that fuel is purchased in quantities that can be used within 30 days.
This will assure fuel freshness and volatility tailored to the season.
You can add the fuel stabilizer in a gas can to use in multiple engines.
You can add fuel stabilizer directly to the gas tank.
Run Lawn Mower
Run engine for 2 minutes to circulate stabilizer through the fuel system.
After you run the lawn mower check to make sure the oil level is good.
You should also check for leaks on the engine.
Make sure there are no vibrations coming from the deck. Which could be caused by an unbalanced lawn mower blade.
Check Tighten Bolts
Check all fasteners, Nuts and Bolts and make sure these are tight.
Look over your Lawn mower and make sure nothing is broken and everything is working properly.
Finished
Store mower in a dry, clean area.
Do not store next to corrosive materials, such as fertilizer.
When storing any type of power equipment in a poorly ventilated or metal storage shed, care should be taken to rust-proof the equipment.
Using a light oil or silicone, coat the equipment, especially cables and all moving parts of your lawn mower before storage.
Watch Video
If you prefer to watch the video on this DIY How to winterize / store you Lawn Mower check out our video. Subscribe to our channel for more DIY How to videos.


